Wednesday, December 16, 2015

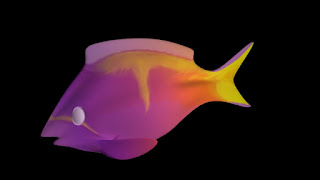
PURPLE QUEEN ANTIAS

During the beginning of the year, I was assigned to make a fish from scratch in Maya with bone rigging and painted weights. In this post, I will talk about the steps I took to achieve this, problems I faced, and what I could have done to improve my project.

BUILDING THE FISH

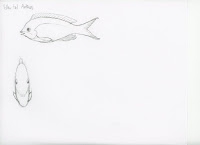
Scanned Drawing
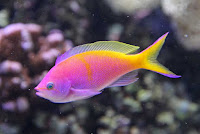
Purple Queen Anthia


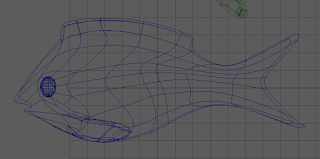
First, I drew a front and side view of my fish on paper. The fish here is based off of the Purple Queen Anthia breed of fish. The drawing was then scanned and brought into Photoshop for cropping.

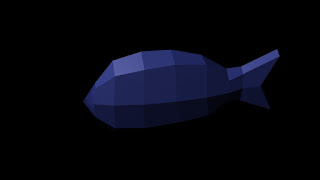
Original Maya Fish Base
Next, I made the fish model by making a rectangular polygon and divided it into several faces. From there, I edited the fish's faces, vertices, and edges to give the rectangle a goldfish appearance without adding in fins or other characteristics. My apologies for the bad lighting on the image to your left.

MOLDING THE DETAILS


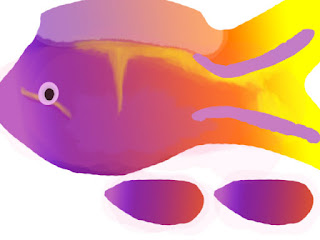
Maya Fish Photoshop Layer


Maya Fish Side View

Once the fish was assembled, I went into the Window Outliner to take a screenshot of the fish's side view. I then brought this image into Photoshop to make the fish's color pattern. After that, I dragged the file to the Window Outliner. In here, I shifted the faces to fit the fish model on Maya.
After that, I imported my fish sketches into Maya and edited the fish's faces, edges, and vertices to fit the side view. Next, I switched between the top and perspective view to thin out the fish and give the fish a realistic view because fish are thin scaly creatures with lots of curvy features. Then, I cutted out holes for the fish's eyes and extruded out some of the faces to create the top fin and side fins. Since this was done on one side of the fish, I then duplicated the fish's side, and merged the shapes' vertices together with the Merge Vertices option. I also made the fish's eyeballs with white spheres.

BONE RIGGING AND MOVEMENT

Fish with Bones and Joints Selected
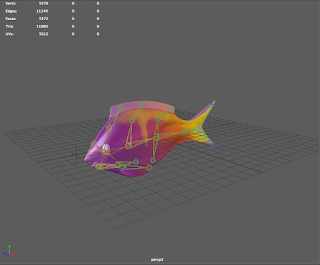
Once the fish's visuals were completed, I then made the skeleton through a Lynda Tutorial. In this tutorial, I learned that each joint is connected and there is one main joint that is connected through all of the other joints. While messing with the joints, I discovered that if certain joints are selected, then the joints that are connected to that joint will move along with it.


Painted Skin Weights View
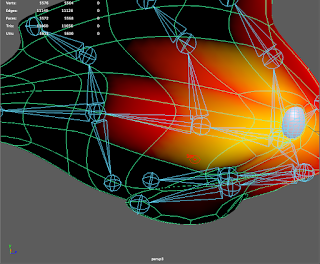
To fix how certain parts of the fish moved when certain joints were selected, I went into the Paint Weights Tool. In there, I selected each joint and highlighted the areas that I wanted to move when that joint moved.


PROBLEMS I ENCOUNTERED

While painting the weights, I happened to have one of my vertices stretched out past my fish. Despite my many attempts to move the faces, edges, vertices, and repaint the affected area, I could not fix it. Fortunately, I have a backup copy of this file, but that file doesn't have any of the animated keyframes.


CONCLUSION

Maya Fish Final Result

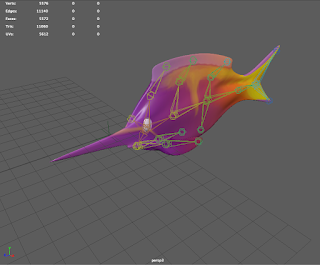
I enjoyed making a fish in Maya because it allowed me to have a break with 2d animation and expand my knowledge in Maya. Even though I ran into a few problems, I am happy with my results and liked learning about the Painted Weights and Bone Rigging.

FIRST SEMESTER PROJECT OVERVIEW (CMYK)

I have been working on my independent animation project this semester originally titled "Lost In The City". As I was working, I didn't like the title and eventually changed the name to CMYK. CMYK refers to the four main colors used in printer cartridges; cyan, magenta, yellow, and key, where key represents black. Like the RGB model, the CMYK model makes up all of the colors with different percent values of each color. I chose this name because the paint used in the project consists of all CYMK colors, plus a bright orange, neon green, and white. These extra colors were added on for contrasting reasons, and I wanted to give more color to the project besides the main colors as a way to avoid too much minimalism.

BUILDING THE CITY

City Street Sketch

City Street Outline

City Street  

City Street Full Color

I made the city scene one layer as if it were a strip mall. In there, I included apartments, a coffee shop, and a library. The environment of the street is fresh and lively full of street passers like a biker, a stray cat, and children playing jumprope.
However, the main character is feeling neutral and not very upbeat, which explains why the beginning scene is completly black and white.

To make the scenery, I sketched out the street buildings, then scanned the drawings to Photoshop to construct each building using several shapes. After that, I made a street layer and a median layer with trees and grass on the front. I formatted each layer to a PNG file to avoid the shapes rasterizing, or getting blurry when zoomed out on.

PAINTING THE WALL


I first began making the wall by sketching outlines for each thing that would go on the wall. They mainly consisted of abstract and themes that don't really clash together like a claw machine full of toys, a forest, a koi pond, marker, and electricity. While making my sketches, I looked at several references for inspiration on how they should be made. Once all of the items were sketched out, I made them into shapes using the colors I selected. After each object was made, I brought each object to their designated group 

Koi Pond Sketch Progression

Concrete Wall Sketch

Concrete Wall Full Color

I originally planned on Luke painting the wall, but that involved adding in a lot of masks on After Effects. Below here is an animated loop of Luke holding a paintbrush and painting the wall.


ANIMATING THE CHARACTERS


Animating each person involved the same steps of making the primary frames, then adding in-between frames. For animating the stick figured humans like Luke, I looked to this video, which is an animated loop of a stick figure walking on the side view and front view. 

This video was very useful when animating the part where Luke enters outside. To get the feet walk cycle in correct swing, I used rulers to measure where the arms and feet should end. 

Full Image of Rulers
Legs with Rulers


STREET WALKER ANIMATED CLIPS


Below here are some of the animated characters I made. They loop back each other back and forth, and make short appearances out in the street (with the exception of Luke).


Luke Walking Slowly


Mother and Daughter


Kids Playing Jumprope


Alley Cat


THE DOOR


I also made a door for the beginning of the project. I sort of had to because Luke is entering outside his apartment and needs a nice door. I made the door using two rectangles and a thin rectangle that would depict the door's side edges where they would meet. I animated it using a Youtube tutorial, and added in the side part of the door between the two door faces. Adding this in gave the door a 3-dimensional appearance in a 2-dimensional platform.

MIXING IT ALL IN AFTER EFFECTS

Concrete Wall Masks
Effect Settings

A lot of my problems came in while using After Effects. Most of them came from the fact that I was under a huge time constraint. While I did get all of my layers in, I didn't have enough time to fully animate them, specifically on the part where the concrete wall is being painted. I only got one part of in, so I cutted my project to half and won't use the footage where Luke paints the wall.

Paint Buckets
Walking Through Town


I did, however, get the beginning part in the city streets animated, and added in the concrete wall paintings already painted on the wall. As Luke walks by the drawings, the city will gain it colors again and be bright. Once that is done, the whole city street is shown in full color.

To make the city add color, I used the Curves and Leave Color effects. To change the colors from Black and White to the desired color, I added in two Leave Color effects, where the first color was any color I wanted, and the second color was the color I wanted to appear on the screen. 

Below here is an example of the city changing color to blue. 


After everything came together, I made the credits, which consisted of the title "CMYK", and my name. The credits started out with white text, and eventually fade into the CMYK colors in order as shown below. I really like this because it explains the title in a short way and makes the project very unique.

Credits Example 

VIDEO FOOTAGE PROGRESSION


Here below are a set of video clips from my project that depict the project's progression and improvement overtime. They consist of different scenes. It is best to watch these in order from top to bottom to see how much the project has developed overtime.


FINAL THOUGHTS


This project went pretty well with the exception of time constraints. I took a different approach to my time constraints and remained relax not rushing over parts, which is better than how I have reacted in the past. Luckily, I found ways to cut out parts with what I have and made them work together while keeping the end result the same. I enjoyed making the concrete wall, some of the street passers, and the end result of this multi-planar animation.

You can watch the full version of CMYK here!

Saturday, October 10, 2015

PROFESSIONAL PROJECT: WE ARE GIANTS

Music videos are wonderful ways for animators to show their artistic abilities and collaborate with well known musicians. Rising stars Lindsey Stirling and Dia Frampton collaborated on a song titled, We Are Giants. This song's music video was recently released out on Youtube, and I am amazed by the imagery this music video has. On this post, I will talk about each scene and break down each pat I find interesting.


A majority of music videos start out with the setting, which is depicted as a futuristic part of San Francisco with a coastline and wind turbines promoting clean air. The city is then zoomed in to reveal a clean futuristic Chinatown. Then, a young teenager version of Lindsey appears walking through the market streets for a chance to get a tomato before they are sold out.


I really like the color contrast from this art style, especially from the tomato. The tomato stands out as a bright red pigment among all of the other vegetables on the stand showing its importance to the entire music video's plot.


Once Lindsey retrieves a tomato, she leaves the market stand, only to begin using the tomato as her weapon. We can see behind Lindsey that a Godzilla like creature lurks behind her and is about to invade...
The fighting then breaks out in town as the Godzilla like creature has a showdown with a yellow squid monster with several eyes, even on the tentacles.
I find the art style to be very wonderful without any black outlines. This gives the music video a 3D appearance in a 2D platform. This shot of Lindsey's hair perfectly describes that with her geometric hair strands showing  2 point perspective, which I find very appealing to me.
Here we can Lindsey begin her power up stance to throw her tomato as far as she can.
The rising action of the story begins with here, as Lindsey throws the tomato at super sonic speed aiming at Godzilla and the squid in order to stop the madness.
Godzilla notices Lindsey for throwing the tomato and try to catch her as he continue fighting the squid. I appreciate the variety of camera shots like in this scene showing the two characters' reactions.
Lindsey then decides to go to the big tower, a risky idea, that she decides to go for anyway. From my understanding, the tower is the most notable thing about the city, as if this were the new Golden Gate Bridge to this futuristic San Francisco.
As Lindsey runs to the top of the tower, the audience beings to see a potential ally- a young boy.
This little boy recognizes Lindsey as a hero be being the only one willing to fight the monsters. He then allies with Lindsey and help her by giving Lindsey back her prized tomato.
Once Lindsey reaches the top of the tower, she gets a front row seat of monster tug-of-war. As she studies their moves, Lindsey formulates a way to distract the monsters.She then remembers the tomato in her backpack, only to be missing.

Once again, Lindsey's geometric hair appears to be 3 dimensional by having the ends of her hair point to the camera.
As the monsters fight, they unintentionally destroy the tower, knocking it over and leave Lindsey hanging.
As Lindsey is left hanging, she gets herself up to high ground.
From there, the little boy and Lindsey make first contact. It ends up being a positive experience, as he appears to have retrieved the lost tomato.
The little boy then attempts to toss the tomato to Lindsey upwards.

The irony behind this screenshot is that the ground now looks like a monster with the water fountain eyes and concrete snout.
Here we see the climax of the entire music video, as Lindsey attempts to catch the tomato, but ends up biting the tomato and the tomato becomes obsolete. I really enjoyed this part of this animation for having large amounts of anticipation building up for Lindsey catching the tomato, but failing in a very dramatic way.
Since the tomato trick didn't work, Lindsey decides to warp herself to space. While I enjoy the lighting of this scene, I don't understand why Lindsey didn't do this in the beginning of the music video.
All of the town is surprised Lindsey has space powers, and wishes they had her powers.

Another thing I have noticed is the coloring. The townspeople are in dark and gray colors, while Lindsey wears a variety of colors and patterns, inferring that Lindsey stands out in the city and is not like the rest of the crowd.
Lindsey beams herself up to the stars to find her answer for defeating the monsters. This depiction of space is calming and sticks to the theme of using around 3 to 4 main colors for each scene.
What is Lindsey doing in space? Why, she is activating her violin powers, because why not. After all, Lindsey is a violinist, and any Lindsey Stirling music video isn't complete without a violin part.
Lindsey then descends down to Earth and plays a violin solo while Lucy is in the sky with diamonds in her angry eyes.
After the solo, the monsters enjoy her song and are amazed by her playing abilities. This song is the first sign of friendship as seen by Godzilla's smile.
The monsters apologize for their behavior by rebuilding the tower and the remaining wreckage together.
After the mess has been cleaned, Godzilla and the squid part out to sea and head home, since it is sunset. The squid and Godzilla then play fight while walking back home, only to peacefully depart under the ocean.


FINAL THOUGHTS


If you are looking for some inspiration and a different take on animated music videos, this music video offers all of those things. I enjoyed the bright colors, perspective points, camera shots, and scene for We Are Giants. This music video also features a noticeable plot line with a unique set of protagonists and antagonists, which we can all relate to.

Go watch the full music video through this link!