During the beginning of the year, I was assigned to make a fish from scratch in Maya with bone rigging and painted weights. In this post, I will talk about the steps I took to achieve this, problems I faced, and what I could have done to improve my project.
BUILDING THE FISH
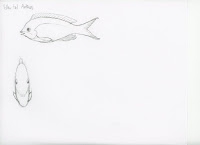 |
| Scanned Drawing |
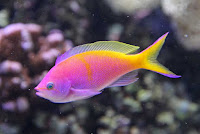 |
| Purple Queen Anthia |
First, I drew a front and side view of my fish on paper. The fish here is based off of the Purple Queen Anthia breed of fish. The drawing was then scanned and brought into Photoshop for cropping.
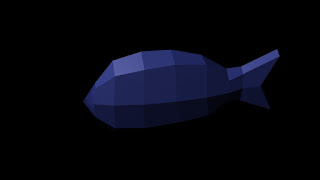 |
| Original Maya Fish Base |
Next, I made the fish model by making a rectangular polygon and divided it into several faces. From there, I edited the fish's faces, vertices, and edges to give the rectangle a goldfish appearance without adding in fins or other characteristics. My apologies for the bad lighting on the image to your left.
MOLDING THE DETAILS
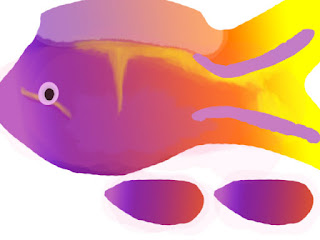 |
Maya Fish Photoshop Layer
|
 |
| Maya Fish Side View |
Once the fish was assembled, I went into the Window Outliner to take a screenshot of the fish's side view. I then brought this image into Photoshop to make the fish's color pattern. After that, I dragged the file to the Window Outliner. In here, I shifted the faces to fit the fish model on Maya.
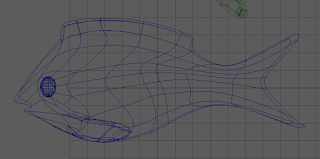
After that, I imported my fish sketches into Maya and edited the fish's faces, edges, and vertices to fit the side view. Next, I switched between the top and perspective view to thin out the fish and give the fish a realistic view because fish are thin scaly creatures with lots of curvy features. Then, I cutted out holes for the fish's eyes and extruded out some of the faces to create the top fin and side fins. Since this was done on one side of the fish, I then duplicated the fish's side, and merged the shapes' vertices together with the Merge Vertices option. I also made the fish's eyeballs with white spheres.
BONE RIGGING AND MOVEMENT
 |
| Fish with Bones and Joints Selected |
Once the fish's visuals were completed, I then made the skeleton through a Lynda Tutorial. In this tutorial, I learned that each joint is connected and there is one main joint that is connected through all of the other joints. While messing with the joints, I discovered that if certain joints are selected, then the joints that are connected to that joint will move along with it.
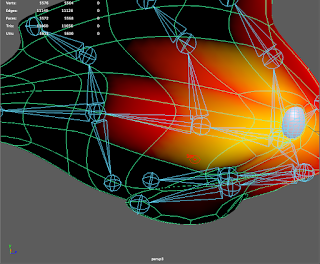 |
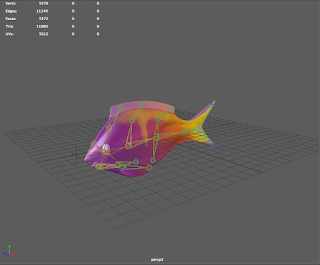
| Painted Skin Weights View |
To fix how certain parts of the fish moved when certain joints were selected, I went into the Paint Weights Tool. In there, I selected each joint and highlighted the areas that I wanted to move when that joint moved.
PROBLEMS I ENCOUNTERED
While painting the weights, I happened to have one of my vertices stretched out past my fish. Despite my many attempts to move the faces, edges, vertices, and repaint the affected area, I could not fix it. Fortunately, I have a backup copy of this file, but that file doesn't have any of the animated keyframes.
CONCLUSION
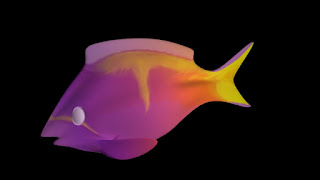 |
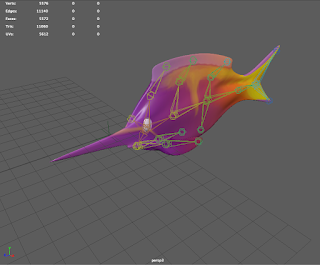
| Maya Fish Final Result |
I enjoyed making a fish in Maya because it allowed me to have a break with 2d animation and expand my knowledge in Maya. Even though I ran into a few problems, I am happy with my results and liked learning about the Painted Weights and Bone Rigging.


 While painting the weights, I happened to have one of my vertices stretched out past my fish. Despite my many attempts to move the faces, edges, vertices, and repaint the affected area, I could not fix it. Fortunately, I have a backup copy of this file, but that file doesn't have any of the animated keyframes.
No comments:
Post a Comment