This past week of wrapping up the ONW NOW Ending Project has been full of incorporating additional details that play a big role of determining the feeling of the project as a whole. My last update concentrated on the foundation of the looks, but this update will continue onto the secondary parts of the project, as I follow the
Video Copilot Tutorial.
The next major step of the video tutorial after compiling the rendered compositions together, was to create white circular panels. I began the creation of these panels by making a white square, and adding a fast blur.
I then duplicated the square three times, added a wiggle lighting effect, which randomizes how often the square will blink. I also aligned the squares parallel to each other with the align layers tool. This new feature to me was very helpful for me since I like my objects straight in order.
My next major step was to add the polar coordinate effects to the squares to form the panel. I then set the conversion to "rect to polar", and increased the interpolation all the way to 100 percent.
After completing the panel, I duplicated it, scaled it to the outside, added glow and tint effects for appearance, and rotation expressions so the panels may rotate like the other compositions.
After testing the background color using color collection and curves, I played with the alpha, red, blue, and green channels to match ONW's raven blue color, as shown on their website below.

Animating with the Bulge effect was tough. I encountered problems with the bulge as it scaled down. Here below are some screenshots of the various bulge conflicts.
One thing that bothers me about the Bulge effect as it scales down is that it leaves traces of feathery ends in the outer panel.
The problem occurring here as the bulge moves is it touches the middle electrical layer. As that happens, the bulge layer creates a water effect, which I happen to find to be very "electrifying" (pun intended).
I took a break from animating the whole project, and decided to add in electric layers on the inside of my project.I constructed them by copying my original composition, and made different changes to each composition.
Significant changes like the force motion blur effect and multiple frequency spheres were used. The audio was also changed because the audio for the final project has been used multiple times, and I don't want these projects to match that audio.
The bottom one is very hard to see because of it's very low opacity.
Animating the projects was very complicated. I had to match keyframes with the audio,which is a very lengthy process. I do love how After Effects displays the frequency bands for the audio, a useful guideline of where to place keyframes. Effects that were edited with keyframes include the opacity, rotation, and scaling. Doing this taught me how to animate with audio and keyframes.

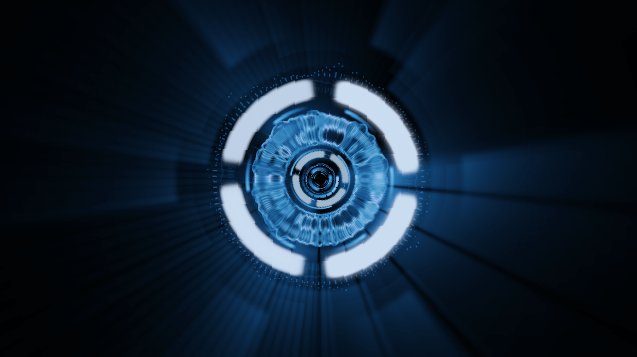
This is a screenshot of what the composition looks like without the compass logo, as mentioned in my previous blog post. The process was time consuming, but at the end, all of the layers flowed well together.
My major challenge was getting the panels to rotate with keyframes,since they were set to rotate with an expression, and had to manually delete the expression and replace the rotation with keyframes.
The last major step I need to make is to add in Optical Flares with the help of a senior experienced with this effect.
I only have a few days left to finalize the project, and get it to the best of it's ability. My goals to be completed are to meet with Video and evaluate the project. I also plan on meeting with one of the seniors who did this project in the past and let him judge what changes need to be made.


No comments:
Post a Comment